Pages

Slider

Steak with Warm Bean Salad

Steak & Bean Salad | Hannah Lundberg Bay Area Food Photographer

I am currently in tomato heaven. Hea-ven. The heirlooms are in season and I am love, love, loving them! We don't really get much in the way of heirloom tomatoes in Australia so this is my first summer having them in abundance at the farmers' market. With all these tomatoes, I have been finding ways to inject their gorgeous colour in just about every meal that I make. 

This steak dish combines baby heirloom tomatoes with a delicious, lightly seasoned sirloin steak and a hearty string bean and white bean salad. It is not a complex meal but it is definitely satisfying! So give it a try if you are looking for a tasty and easy steak dinner. 

Steak & Warm Bean Salad | Bay Area Photographer Hannah Lundberg

Ingredients: 
  • 4 Sirloin Steaks (palm-sized), patted dry 
  • Salt and Pepper 
  • 3 Cups Green Beans
  • 1 Can Cannelini Beans, rinsed and drained
  • 1 1/2 Cups Mini Heirloom Tomatoes, halved
  • 3 Garlic Cloves, thinly sliced
  • 2 Tablespoons Extra Virgin Olive Oil
  • 1/4 Cup Red Wine Vinegar 

Instructions: 
  1. Season steak with salt and pepper. 
  2. In a skillet, season one teaspoon of oil on medium-high heat. Cook steak on until browned, 3-4 minutes each side, until it is medium-rare. 
  3. Transfer steaks to a cutting board and allow to rest. 
  4. Rinse skillet and return to heat with 2 tablespoons of oil. Add the green beans and cook for three minutes. Throw in cannelini beans and the vinegar and cook until warmed through. 
  5. Remove skillet from heat and throw through tomatoes. 
  6. Slice rested steak into thin strips. 
  7. Divide bean salad into four servings and top with sliced steak. 
  8. Enjoy!
Steak With Warm Bean Salad

Steak With Warm Bean Salad

Grilled Peaches & Farmers' Cheese on Sourdough Toast


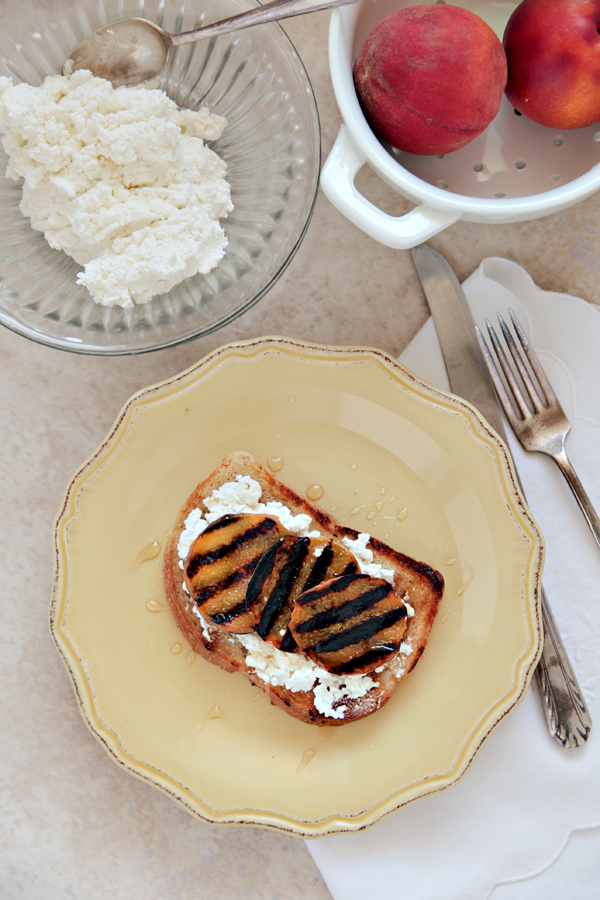
grilled peach toast | hannah lundberg bay area food photographer

I love peaches. I am so enjoying all the stone fruit this season. With our big international move we skipped a Summer in Australia and I had been hanging out for some delicious stone fruit. Finally we're in the midst of the season and it is just amazing! We picked up a beautiful variety of peaches at the Campbell Farmers' Market over the weekend. I absolutely adore the farmers' markets in Summer, with their array of colours and textures and amazingness.

Afterwards, we went to a fabulous, hilarious and yet comforting Russian Deli and Cafe for matzo ball soup to soothe my husband's throat as he has a nasty flu. I will write about the deli soon (it's amazing!) but while we were there, buying all manner of food that evoked great memories for my husband of his beloved Bubba, I found farmers' cheese. This is a pretty traditional Russian food and one that I loved as a kid living in the US. When we moved back to Australia I never found any that tasted quite like the one from Schnuck's in St Louis. Well, I finally found some tucked away in the deli - I got so excited when I saw it, I can't even tell you. 

Now, it seems that the farmers' cheese I ate in St Louis was a seasonal, Pesach (Passover) item that was a blend with creamed cheese. No matter, this plain farmers' cheese is delicious and more like the creamed cottage cheese that you get easily at home in Australia but doesn't seem to exist in the US. To basically I have hit two culinary desires with one stone in finding this cheese!

I had great memories of eating is with raspberry and cherry preserves on Matzo during Pesach but I felt that for today, with its cottage cheese-y texture, it belonged on delicious sourdough from the Markets with a delicious grilled peach. Now, if you're wondering why I have a recipe for cheese and peaches on toast - be assured that marinating them in honey and white balsamic leads to deliciousness that cannot fully be articulated through words and images alone. The result was a super tasty flavour sensation that fulfilled my food nostalgia needs and kept me full from 11am to 6pm!

Grilled Peach Toast | Hannah Lundberg Bay Area Photographer

Grilled Peach Toast | Hannah Lundberg Bay Area Photographer


Grilled Peaches & Farmers' Cheese on Sourdough Toast

This recipe makes 6 slices and will serve 3-6 depending how hungry you are. It's so tasty I'd lean towards serving 3! 

Ingredients: 
  • 6 Slices Sourdough 
  • 3 Large Pieces (Ideally, these need to be only slightly soft to the touch) 
  • 2 Tablespoons Grassfed Butter, Melted
  • 2 Tablespoons Raw Honey 
  • 1 Tablespoons White Balsamic Vinegar 
  • 1/8 Teaspoon Sea Salt 
  • Farmers Cheese
Instructions:
  1. Preheat grill pan to med-high. 
  2. Whisk together 1/2 honey, 1/2 melted butter, white balsamic and sea salt. 
  3. Slice peaches into 1/4 inch thick slices. I cut the round 'ends' off and eat them or keep them aside with lemon juice on them for snacking later. 
  4. Coat the peach slices in the wet marinade and set aside. 
  5. Lightly coat each side of bread with the remaining butter. 
  6. Place bread on the grill and grill 1-2 minutes each side. Set aside.
  7. Grill peaches 3-4 minutes each side. 
  8. While peaches grill, spread farmers' cheese on the toast. 
  9. Top with grilles peaches and drizzle with remaining raw honey. 
  10. Sprinkle with sea salt flakes if desire and serve - this also tastes fantastic with some shredded basil on it, as well. 
  11. Enjoy! 

Grilled Peach Toast | Hannah Lundberg Bay Area Photographer

In Season | White Nectarines

hannah chester bay area food photographer

hannah chester bay area food photographer

hannah chester bay area food photographer

Summer is my favourite season for fruit. Between the stone fruits, the delicious berries and the variety of cherries I am in absolute heaven. I pretty much don't need to eat savoury foods for a few months! This week, I am addicted to white nectarines. There is something so light and delicate about their flavour - they're perfection!

I have some cool plans for the surplus of nectarines I seem to have in the house next week - something with gluten free puff pastry (yes, puff pastry) and a whole lot of vanilla. Mmmmm. 

Chipotle Lime Chicken Tortillas with White Corn & Avocado Salsa

Grilled Summer Dinners | Bay Area Food Photographer

In case you missed the memo, Summer is well and truly here. It's hot out and so I am defaulting to grilling a lot of meat. We only moved to the US in November and other furniture has taken precedence over a barbecue but I do have a griddle to do a bit of grillin'. I have to say, a proper grill is on my list of wants and needs for our home here, for sure! 

It is no secret to anyone that knows me well that I love and adore Mexican food. It's one of my fave flaves, for sure. I had a hankering for a little Mexican delight and my husband wanted this corn and avocado salad we'd had at a friend's house a couple of weeks ago so I whipped up this Chipotle Lime Grilled Chicken with my version of that salad. 

Grilled Summer Dinners | Bay Area Food Photographer

Just a note on this salad, my husband hates peppers (capsicum) and is allergic to cilantro (coriander) so I make two salads out of this and they're split for the pictures but if there are no restrictions on peppers and cilantro for you then I would mix it all together for one delicious symphony of freshness in your mouth. Trust me, you won't regret it. 

Chipotle Lime Chicken:
  • 1/4 cup garlic olive oil 
  • 1/4 cup lime juice 
  • 2 cloves garlic, crushed
  • 1 tablespoons chipotle powder 
  • 2 chipotle chilis in adobo sauce, crushed to a smooth paste
  • 1 tablespoon turbinado sugar 
  • 1 pound chicken breast tenders 
Instructions:

  1. In a large glass dish, combine oil, juice, chipotle powder, crushed chipotles in adobo, honey, crushed garlic and sugar. Stir to combine. 
  2. Rinse and pat chicken tenders dry, then add to glass dish and turn to completely coat. The marinade should cover all the chicken. Put in fridge for 3-8 hours. I find that 3 hours is more than enough. 
  3. Turn grill to medium heat. Place chicken on grill and cover - cook for 6-8 minutes. 
  4. Turn chicken and cook for a further 4-6 minutes or until chicken is 165F according to a meat thermometer.
White Corn, Avocado & Heirloom Tomato Salsa:
  • 2 ears white corn, rinsed and stripped
  • 8 mini heirloom tomatoes, diced 
  • 1 ripe avocado, diced
  • 1/4 red onion, diced 
  • 1/2 red pepper, diced
  • 1/2 yellow pepper, diced 
  • 1 green onion, chopped 
  • 2 tablespoons fresh cilantro, chopped 
  • 2 cloves garlic, crushed
  • 1/2 cup fresh lime juice 
  • 1 teaspoon kosher salt 
Instructions:
  1. Mix lime juice and salt together.
  2. Toss all chopped ingredients together, thoroughly.
  3. Pour dressing over salad and toss.
Serve chicken on a white corn tortilla with salsa verde and a heaping side of corn salsa. Enjoy! 

Grilled Summer Dinners | Bay Area Food Photographer

Bay Area Food Photographer


Inspired by 5 Ingredient Fix

Mushroom, Microgreen & Goat Cheese Omelet

Mushroom, Microgreen & Goat Cheese Omelet | Bay Area Food Photographer

Last week ended up being kind of a crazy week. My mother's best friend's father died after a long battle with a variety of health issues at the age of 83. My mother's friend's family are not just friends to me...we are part of the family to them. After hearing that Edsel had died on Sunday I felt out at 4am Monday morning to be there for the funeral and to spend time with family as they sat Shiva (a Jewish mourning tradition). It was bittersweet week - full of many tears and triple the number of laughs. Edsel's life was celebrated and his legacy was clear for all to see. 

Food is a huge part of Jewish culture and mourning is no different. It felt like the entire week was spent eating, eating and then eating some more. His favourite holiday was July 4th so on Thursday we ate hot dogs and put out his favourite July 4 decor and remembered the many 4ths that have come before. When people felt bad about eating their fourth cookie, I just told them that food is healing. 

I came home with the flu and have spent the last day or two in bed watching the West Wing and eating popsicles. I craved simple food and this omelet is just the ticket. A couple of eggs, mushrooms and a handful of organic microgreens is all you need to have a delicious, healing meal. 

Omelet | Bay Area Food Photographer

Omelet | Bay Area Food Photographer

Ingredients: 
  • 1 Teaspoon Butter 
  • 3/4 Cup Button Mushrooms, Finely Sliced
  • 1 Clove Garlic, Crushed
  • 2 Eggs, Whisked 
  • 1/2 Cup Microgreens 
  • 1/4 Cup Goat Cheese Crumbles
  • Salt & Pepper

Instructions: 
  1. Heat half the butter in a non-stick omelet pan. 
  2. Add mushrooms, garlic and season with salt and pepper. Let sit until mushrooms release their fluids. Saute until mushrooms are lightly browned and liquid has disappeared, around three minutes. Removed from pan and set aside. 
  3. Heat remaining butter in pan. Season eggs with salt and pepper and whisk for 30 seconds. Pour into pan and cook until edges set slightly. Push uncooked eggs from centre to the edge, until layered evenly. Cover and cook for 1-2 minutes until cooked to your preference. Remove from heat with non-stick spatula. 
  4. Fill half omelet with mushrooms, microgreens and goat cheese, then fold omelet over. 
  5. Serve immediately. Enjoy!  
Omelet | Bay Area Food Photographer

Inspired by Martha Stewart. Hannah Chester is a food and beverage photographer servicing the SF Bay Area and surrounds. 

In Season | Rainier Cherries


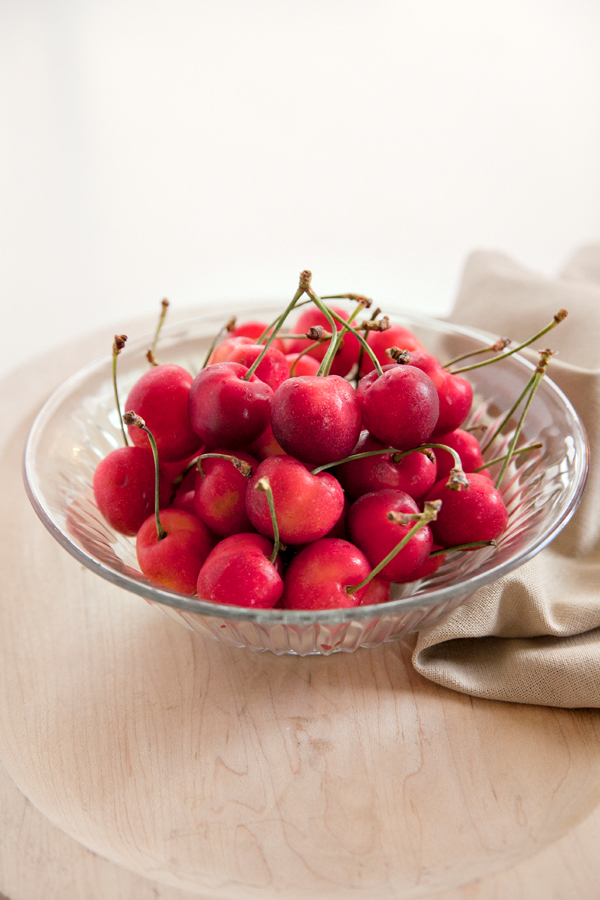
My husband and I are addicted to the beautiful Rainier Cherries that are in season right now. They're just so sweet, plump and delicious. Summer is absolutely my favourite season when it comes to fresh fruit with berries and stone fruit galore but we don't really get Rainier Cherries back home in Australia so these are a whole new and amazing taste sensation. I am enjoying every last one while they're available from local growers! 

Grilled Jerk Chicken Breast

Easy Jerk Grilled Chicken Breast

It's weirdly hot and sticky in the Bay Area at the moment (cloudy and rainy, which I am told is unusual). Sticky weather calls for refreshing salads and grilled meats and this Jamaican Jerk Chicken Breast is just the ticket! I love Cajun food - the mix of spices is delicious and pack a bit of heat without beng completely overwhelming.

As I understand it, Jerk Chicken is kind of like my mother's Matzo Ball recipe. Everyone's mother has their own version so there's no 'right' way to cook it. This marinade is based on one from Food & Wine as well as the back of the bottled Jerk Marinade that I buy at World Market. Together, they make for one tasty recipe. Whether it is 'authentic' or not, will depend on yo' Mama's opinion, I guess.

Grilled Jerk Chicken Breast & Chopped Tomato Salsa

Grilled Jerk Chicken & Grilled Pineapple Chunks

Cajun Style Grilled Jerk Chicken Breast

Summer Grilled Meals


Ingredients

  • 1 small onion, cut into large chunks
  • 2 spring onions, quartered
  • 1 Habanero chili pepper, seeded 
  • 1 garlic clove, peeled
  • 1 teaspoon Asian five-spice powder
  • ½ teaspoon allspice
  • ½ teaspoon dried thyme
  • ½ teaspoon ground nutmeg
  • ¾ teaspoon salt
  • ¼ cup soy sauce
  • ½ tablespoon vegetable oil
  • 1 pound skinless chicken breasts, butterflied 
Directions
  1. Make the marinade: In the bowl of a food processor, combine all ingredients except the chicken breasts. Process until it is a thin, relatively fine paste. It will still be gritty, so don't worry about that.
  2. Place chicken breasts and marinade in a freezer bag, remove air and seal. Shake the chicken to evenly coat and then put in the fridge for at least an hour - preferably overnight.
  3. Preheat grill to medium. Grease pan with either coconut oil or olive oil, I prefer coconut as it doesn't smoke. Place chicken on grill making sure it is well coated with marinade. Cover and cook, turning once, until the breast is browned and crisp but not charred, about 10 minutes.
  4. Serve immediately with chopped tomato and cucumber salsa, sliced avocado and some grilled fresh pineapple with lime wedges. 
Inspired by Food & Wine.

Gluten Free Banana Pancakes

Gluten Free Banana Pancakes

My husband loves bananas. When I fail at housewifery and don't make him breakfast, they're a perfect on-the-run breakfast to get him going for the morning. The only thing is that he likes them at a perfect stage of ripeness - anything over 'perfectly yellow and creamy' and they're inedible. Then they sit there until I have brown mushiness. Lately, I have been excellent on the housewife front (at least with making breakfast, don't talk to me about the ironing, okay?) so I have mushy bananas at a count of six right this minute. Luckily. there's plenty of tasty things to do with that brown mushiness and one of my favourites is banana pancakes. There's something so decadent about them and yet they're really a pretty great start to the day. 

This recipe is gluten-free thanks to the use of Bob's Red Mill gluten free flour. They're also pretty high in protein thanks to some extra egg whites thrown in to ensure that these are filling as well as tasty. These are a thinner pancake - I am yet to perfect the fluffy, gluten-free pancake, but I'll get there eventually! 

GF Banana Pancakes & Maple Syrup

Banana Pancakes On Blue Vintage Plate

Gluten Free Banana Pancakes with Maple Syrup & Powdered Sugar

Ingredients
  • 1 cup Bob's Red Mill Gluten-Free Flour
  • 1/2 cup whole milk 
  • 1 egg
  • 1/2 cup pure egg white liquid
  • 1 extremely ripe banana, mashed 
  • 1 tablespoon melted butter 
  • 1 teaspoon baking powder
Directions
  1. Sift flour and baking powder. 
  2. Add wet ingredients and whisk thoroughly.
  3. Heat pan on low-mid heat.
  4. Pour batter  in 1/4 cup increments onto hot, lightly greased nonstick or cast iron pan 
  5. Cover pancake and cook until lightly browned underneath and when there are bubbles throughout the uncooked top of the pancake. 
  6. Flip and brown the other side - this usually takes less than a minute. 
  7. Serve with butter, quality Grade B Maple Syrup (this has lots of yummy vitamins and minerals and tastes ah-mazing) and powdered sugar, if you wish. 
  8. Enjoy!